Alert Functionality (Premium Desktop Feature)
Alert Functionality
Alerts can greatly improve trading effectiveness by notifying you on a potential trade opportunity and help you decide when to manage, enter or exit a trade.
Set up Alert notifications based on Last Price, Volume, $ Change, % Change, or % Offset.
If you’ve logged into the platform with either Streaming Quotes or RealTime Quotes through a linked brokerage account *within the last 30 days* – Alerts will be Real Time.
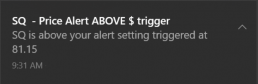
Alert Icons
- Add (+) New Alert – This icon is located on the symbol Quote Box
- Hollow Bell – Active Alert, not triggered
- Shaking Bell – Triggered alert, not yet viewed
- Solid Bell – Alert triggered today, already viewed
- Paused (z) or Used Alert – located in Alert Management Page

Set Your Alert
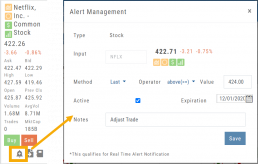
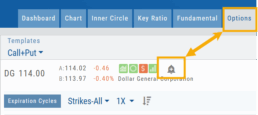
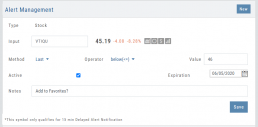
Click the Alert Icon, located on the symbol Quote Box and as shown on the Option Tab for the Chain or Strategy Template. The symbol, Score Icons, Last Price, $ and % Change automatically fill in. To complete the rest:
-
-
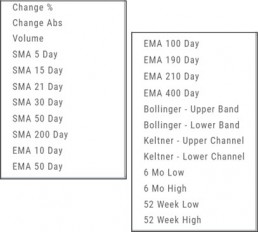
- Select Method: 23 to choose from! See list below
- Select Operator: Above/Equal To or Below/Equal To
- Enter Value: $, % or Quantity (Quantity example: 11,000,000 or 11M)
- Select Expiration: Valid up to 6 months. Click on Calendar Icon to navigate months
- Add Notes, if desired
- Click Save
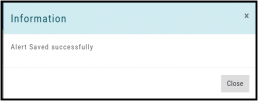
An Information notification appears: Alert Successfully Saved
-
Alert Management
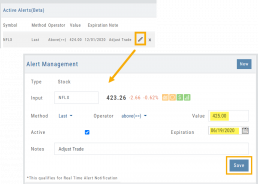
Manage your Alerts by going to: Research Tab>Alerts.
From this page, you can modify or remove alerts, view unread triggered alerts in one location and view prior alerts.
-
-
- Select Method: See List on right
- Select Operator: Above/Equal To or Below/Equal To
- Enter Value: $, % or Quantity (Quantity example: 11,000,000 or 11M)
- Select Expiration: Valid up to 6 months. Click on Calendar Icon to navigate months
- Add Notes, if desired
- Click Save
An Information notification appears: Alert Successfully Saved
-
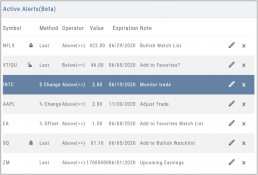
Active Alerts
This table lists all active alerts including:
Trigger notification – A bell icon appears if alert was triggered
Delayed Alert icon, if applicable
Settings – Method, Operator, Value
Expiration Date – Alerts can be active for up to 6 months
Notes
Ability to modify or remove from list
Alert Notifications
In addition to platform notifications, as long as you allow notifications, alerts can be sent to your computer or mobile device even if you are not logged into the platform.
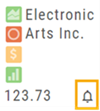
Hollow Bell
The Hollow Bell indicates this Alert is Active, but has not been Triggeredwill appear next to the symbol whether on the QuoteBox in Research or on a Watchlist .
Ringing Bell
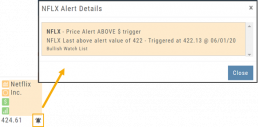
The Ringing Bell icon indicates the alert has been triggered and notification sent out. The highlighted area on the Quote Box or where it appears on a Watch List allows you to access the alert notification by clicking on the bell.
This display will show until the alert is read either from a Watch List, Quote Box or the Alert History section of the Alert Page.
Solid Bell
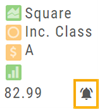
Once an Alert is read or “Marked As Read” on the Alert Notification page, the icon becomes a Solid Bell.
Clicking on the icon will still display the triggered alert until the next Market Day.
Alert History
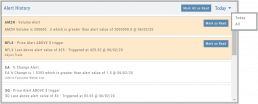
This section displays triggered alerts for the time period selected: Today or All. The highlighted entries are Unread Notifications – the notices were not clicked on from the platform.
Click “Mark All as Read” to update entries.
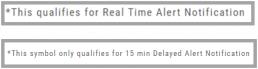
A note about Real-Time & Delayed Alerts
Note: There are two ways 15 minute Delayed Alert Notification applies with Alerts:
1. If it’s been more than 30 days since a linked brokerage account with RealTime Quotes has been logged into – OR – the platform does not have Streaming Quotes.
2. OTC stocks will show as delayed, regardless of RealTime or Streaming Quotes
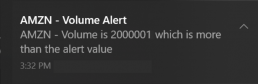
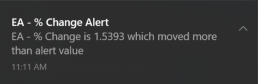
One of two notices will appear for each Alert
Following a Shared Account (Premium Desktop Feature)
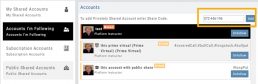
Under Portfolio>Sharing, click on “Accounts I’m Following” on the left-hand panel.
The center panel, above the Account List has a section to enter the code for the Account to be shared on your platform. Enter the code, then click “Add“
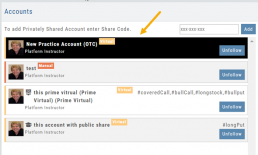
On the bottom, right panel box under “Options“, make sure to check boxes:
Show in Journal
Show in Staged Orders
Alert me about this (Needs permission)
Your device’s settings need to be permissioned for Alerts.
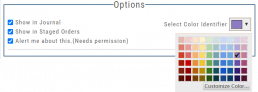
Finally, for easy trade identification, select a color identifier from the dropdown box in the right corner of the Options box.
Link Trades in Journal
Trades can easily be linked in the Journal. This is helpful to keep related trades grouped together for easier tracking and analysis.
Some common applications include:
- Covered Calls – keeping stock and selling Calls with different Expirations
- Adjustment/Repair Trades
- Other previously Unmatched trades
This feature is best used in the Life of Trade View in the Journal.
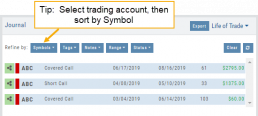
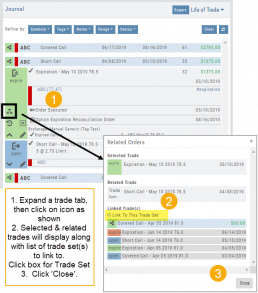
The following steps will allow you to Link Trades: 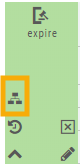
1. After selecting your account and sorting by symbol, expand one of the trade tabs you want to link to another trade group or set.
Click the ‘Link Icon‘
2. A pop-up window will list the Selected (Expanded) Trade, any related trade and Available Trade Sets for that symbol in that account.
Note: You can link trade sets both prior to and following your current, selected trade.
Example: You want to link a May 2019 expired Call to April 2019 and June 2019 Covered Call trade set.
3. Click “Link To This Trade Set” for trade set(s) to link selected trade to, then click “Close“.
In this example, we linked an Expired May 10 2019 short call to an April and June Covered Call trade set.
After linking the trade, notice the total Profit (Loss) Amount updated, but the trade duration did not.
This is because the May Call falls in between the original April trade entry and the June expiration.
If you have more trade sets to link, repeat the previous steps as outlined.
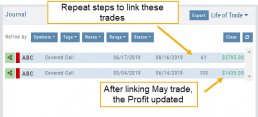
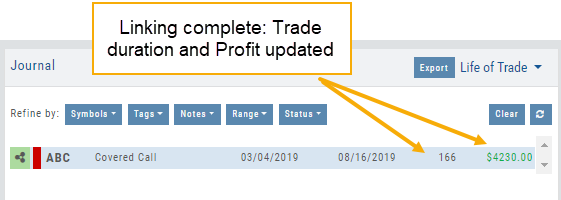
Final note: If you link a trade in error, simply expand the same trade tab and ‘uncheck’ the Link This Trade Set box.
Adding an Account
Accessing a live account is easy. Currently Choice Trade, Tradier, Schwab, E*TRADE and TastyTrade are offered through this platform. More brokerages will be added.
To add an Existing Brokerage Account or add a Virtual or Manual Account:
1. Clicking on the “+” icon will display the screen below
2. Select your Brokerage, Virtual or Manual Account from the drop-down
3. Read & Accept Terms and Conditions
4. Click “Continue”
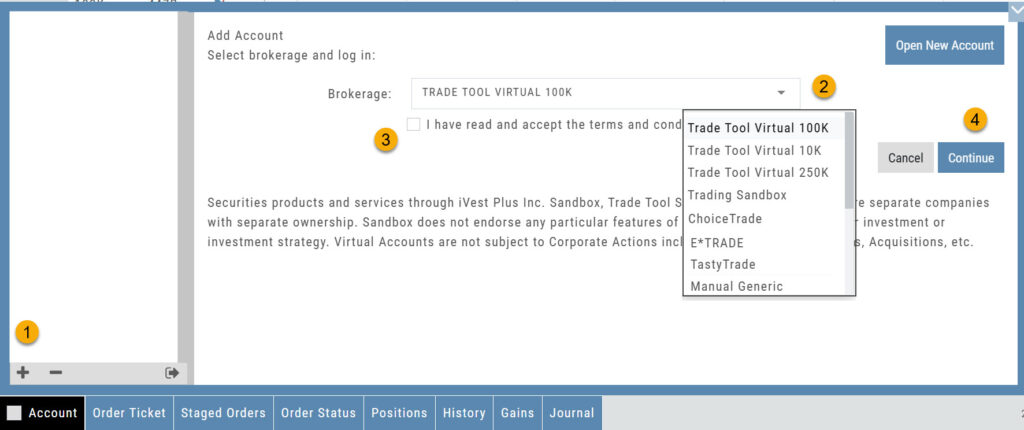
Live Accounts will prompt you to enter your credentials on the next screen.
Virtual** and Manual Accounts will automatically activate.
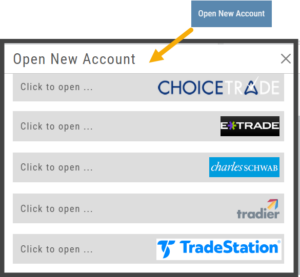 To add a New Live Account, click on the “Open New Account” box on upper right of the above screen.
Select the account you want to add by clicking the selected brokerage.
Click the “Done” button.
You’ll be directed to the brokerage website to guide you through the process of completing an application.
**TradeStation requires a completed account application to create a Virtual Account.
Manual Account Overview
A Manual Account is versatile resource tool which can enhance your trading effectiveness. You can also use this to track trades from an outside brokerage account.
Use the Manual Account for educational purposes.
- It offers flexibility and control, while providing the Analytics and Journal to help you reinforce the “Learning to Earning” process. This allows you to focus on learning the strategies.
- Place trades any time of day or night – all get immediately executed at the price entered. No need for the market to be open.
- No Buying Power limits – no expensive spread margin requirements to adhere to, no limit on how much you can buy/sell
- Place trades in the past.
- Enter trades from Backtest Mode
Use to tracking external accounts
- Can be used to track trades placed at brokers not integrated into the platform
- You can enter the date and fill prices of your actual trades
- This enables portfolio management along with your other accounts
- You can use full Journal function for tracking your progress
Manual Accounts are identified by a narrow Red Bar and are, by default, Auto-Journaled.
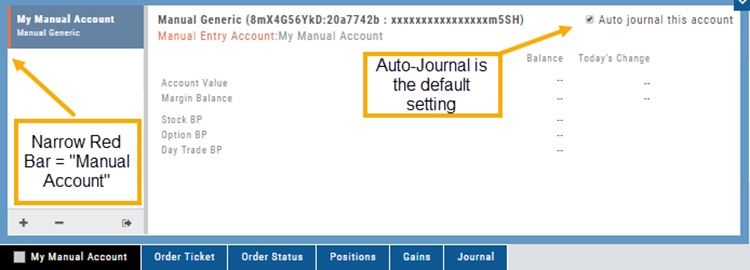
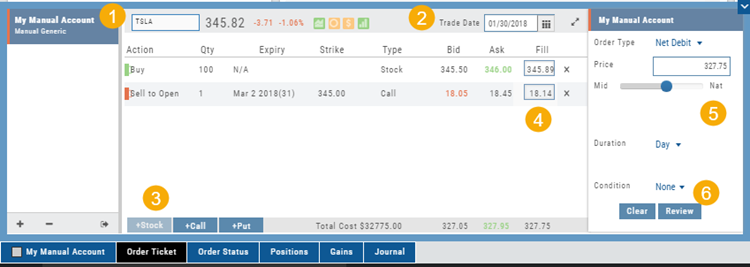
Entering trades in a Manual Account takes only a few steps and is similar to a regular trade.
You can also bring up the ticket from any trade point. Simply start a trade and select the manual account just like you would select any other account.
(Bold indicates unique to Manual ticket):
1. Enter the Stock Symbol, or name of Company (Smart search will display potential matches)
2. If this is a past trade, use the calendar/date picker to select date
3. Click “Stock”, “Call” or “Put” to build trade, change quantity, Expiry and Strike (if applicable)
4. Bid/Ask will automatically populate if a specific price is not entered
5. Complete Order Type, Duration and Condition
6. Click “Review” to confirm information is correct, then ‘Submit” on next screen.
The order will appear in Order Status as “Executed” and operate the same way as other accounts.
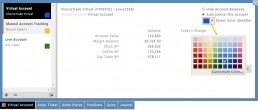
Color Tag Trading Accounts
Select a unique color for each trading account on the Account Summary tab. Each trade in that account will display that color on the Journal trade tab entry.
Now it’s easier than ever to identify trades at a a glance.
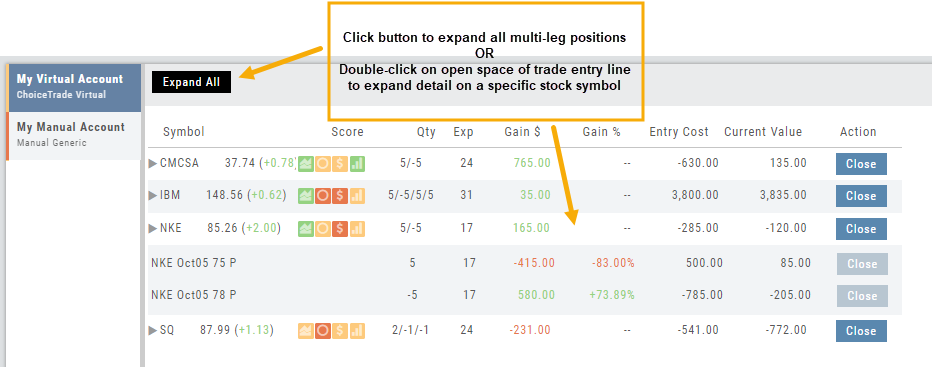
Expand Trade Detail - Positions Tab
There are 3 ways to expand multi-leg trades in the Positions Tab.
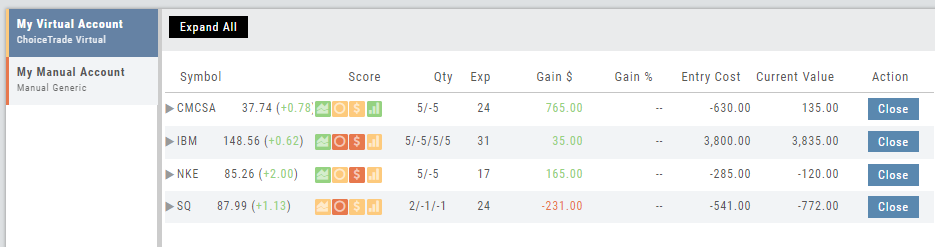
Smart Icon – Click on the  icon to the left of the stock symbol, select ‘Expand/Collapse’. Repeat to close.
Expand All – Click the button above the trade entries if you wish to expand all multi-leg trades. Once clicked, the button will change to Collapse All.
Double-Click – if you want to expand one trade or specific trades, simply ‘double-click’ on an open space of the trade entry line. Repeat to close.
Journal Account Multi-Selector
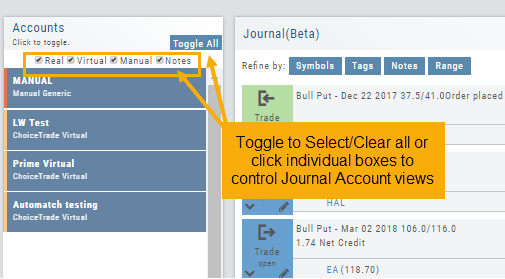
Reviewing your Journal Accounts is made easier by using the Multi-Select tool on the Journal Tab. Control your Journal Account Views by selecting from Live, Virtual, Manual accounts or Notes or any combination of these.
Use the “Toggle All” button to switch or toggle your selection. Example: If you have your virtual selected and not your real accounts, Toggle will switch to real account and unselect virtual account. This can be a great way to analyze your results and compare real and virtual.
You can further sort by Symbol, Tags, Notes or Date Range within an Account by using the following tabs in the Journal:

NOTE: Any filtering, including account selection, will refine your analytics results too. Want to find your results from a specific account. Select just that account and analytics will refect accordingly.
Reconcile Trade Notice
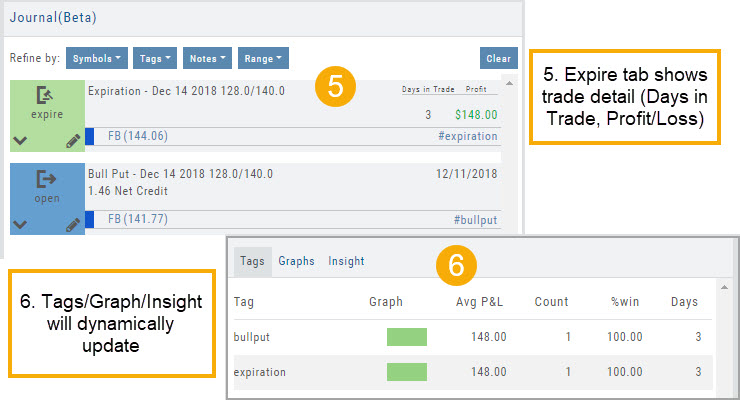
The Tags including the P/L Summary, Graph and new Insight tabs rely on updated Journal entries which includes reconciled trades.
The following notice appears in the Journal when trades needs to be reconciled:

All trades in the trading account(s) selected will display with the option to change back to Regular View:
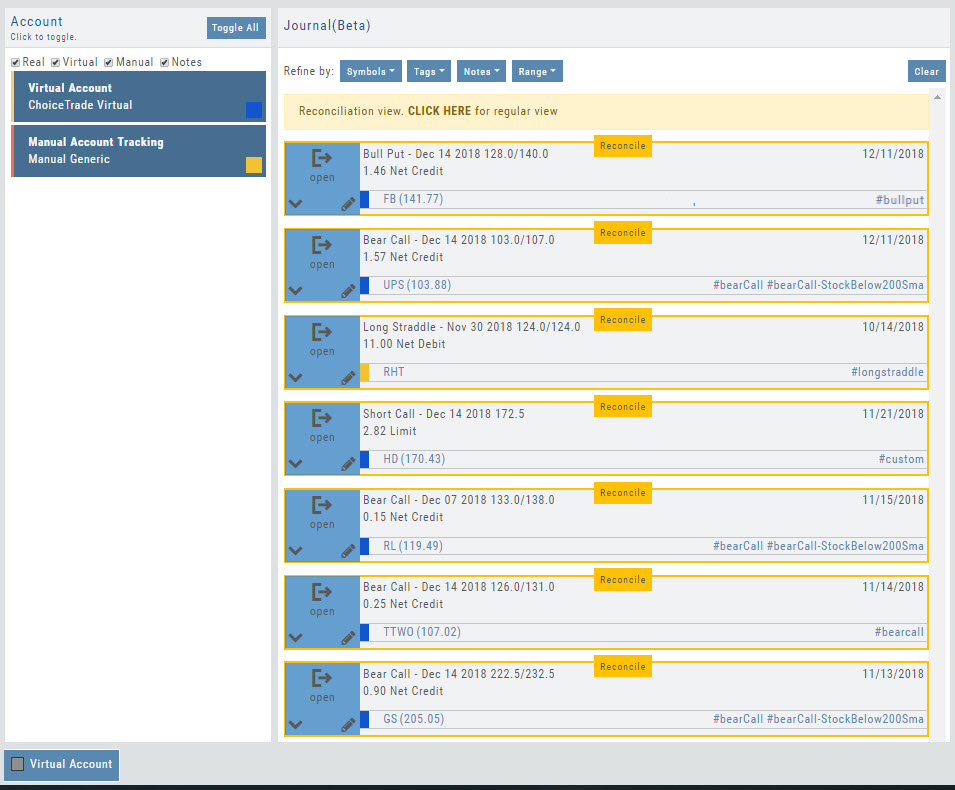
Individual trades are reconciled by clicking on the “Reconcile” tab outlining the Journal Entry.
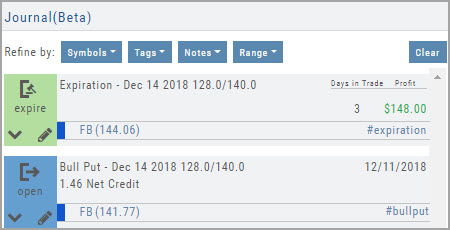
The Journal Tab will update showing the trade had a profit/loss or adjustment in the underlying.
Updating Journal Entries
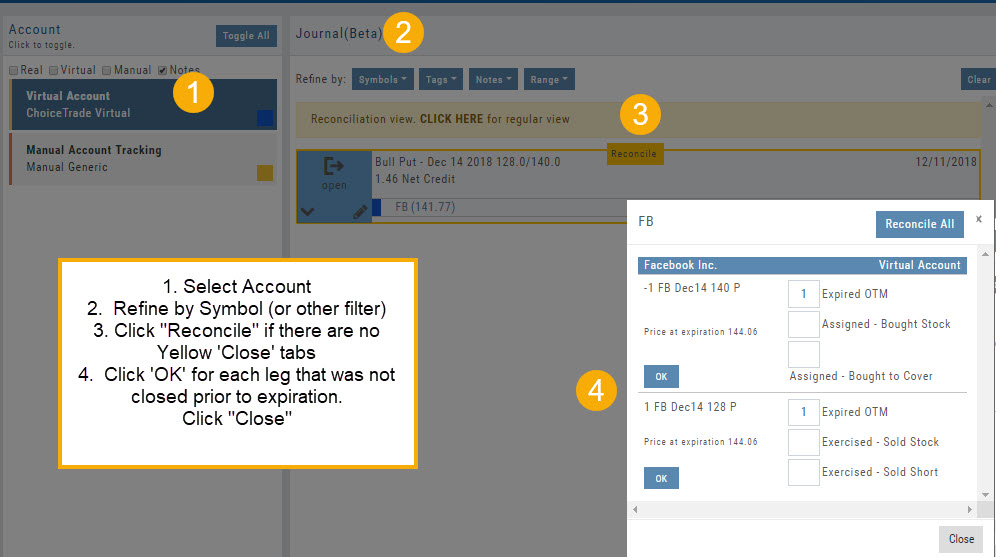
Logging into your account will update Journal entries for up to the last two months. However, trades that expired will need to be Reconciled. If the system is unable to match trades, a Yellow ‘Close’ tab will result, requiring manual action to close.
Follow the steps as shown below to reconcile your trades.
Note: Step 2 is not required, however, if you are just learning to use the Journal and it’s features, sorting by Symbol, especially if you have multiple trades, simplifies the process.